SailorMappy Cosplay Blog!
Mostrando entradas con la etiqueta sailor moon. Mostrar todas las entradas

miércoles, 17 de diciembre de 2014

Tutorial: Cómo hacer lazos para cosplay de Sailor Scout


Hace un buen tiempo hice este tutorial de lazos para las muchachas del grupal de Sailor Moon, es mi forma personal de hacerlos y me ha funcionado bastante bien, por lo tanto quisiera compartirlo con ustedes; de hecho me gusta mucho hacer este tipo de lazos :D son bien divertidos. He notado que muchas cosplayers de Sailors hacen los lazos extremadamente grandes para su cuerpo, o al contrario, pequeños, sin relleno y caídos.... recomendaría que con una cinta métrica midieran el ancho de su pecho y lo hicieran para que quede más o menos de ese tamaño, tal vez 2 o 3 centímetros más ancho como mucho. 

Ahora bien, para comenzar con el tutorial:


Los lazos se pueden hacer con muchos tipos de tela, pueden elegir la que más les guste, yo prefiero usar gamuza/terciopelo porque por alguna razón me imagino los lazos de éste material, además arma bastante bien y da cuerpo. Primero (1) sacamos las medidas de las que queremos que quede nuestro lazo y luego cortamos un retazo de tela con el doble del tamaño que lo queremos, es decir, si quiero un lazo de 25 de largo por 15 cm de ancho, sacamos un retazo de 50 x 30 cm. Para continuar (2), doblamos la tela por la mitad por el lado del revés y lo cosemos.


Una vez que ya tenemos la costura, lo volteamos (3) y lo rellenamos con gomaespuma, si la tela es muy aguada o fina pueden tratar con gomaespuma más gruesa o con varias. Cabe destacar que el relleno debe tener el tamaño del lazo como tal, no debe ser del tamaño del retazo que hemos cortado anteriormente o del tamaño que tengamos la tela en este momento. (4)


Luego de meter el relleno dentro de la tela, la posicionamos de tal manera que la costura quede por detrás del lado que vamos a mostrar (5) y juntamos los dos extremos de la tela por detrás (6)


Ahora cosemos a mano o con la máquina (7) (como prefieran, si es con máquina deben juntar los extremos por la cara de la tela que van a mostrar y luego volver a voltear la tela) los dos extremos y los dejamos por la parte de atrás. (8)


Para lograr hacer la forma del lazo, lo sujetamos justo en el centro y tratamos de hacer varios pliegues. En la primera imagen (9) se puede observar cómo queda con un lazo de gamuza y en la imagen (10) es un lazo de raso di fidanzata.


Cuando ya tenemos la forma que queremos que el lazo lleve, le damos unas puntadas a mano (11) para asegurarlo y que quede con la forma así lo no estemos sujetando(12)


Algunas veces las esquinas del lazo quedan muy cuadradas, y los lazos de sailor llevan como una forma más curveada, por lo que yo doblo las cuatro puntas del lazo para darle mejor forma (13) y las aseguro con unas puntaditas (14)


Ahora la forma del lazo ha tomado una forma más armoniosa (15), posteriormente tomamos un pequeño retazo de tela para ponerla en el medio y tapar la costura que habíamos hecho antes. (16)


Ponemos el retazo de tela bien apretado y luego lo cosemos por la parte posterior (17)de manera que quede como se muestra en esta imagen (18). Para terminar, tenemos las cintas que salen desde abajo, hacemos la forma en dos tapas, que coseremos y voltearemos. (19) 


Luego de coser ambos lados de las dos tiras, poniendo cara con cara la parte correcta de la tela, de modo que veamos solo la parte del revés, la volteamos (20) y las posicionamos por la parte de atrás del lazo, donde lo coseremos a la tira del medio y también cosemos un poco con unas puntaditas en los extremos que se unen con la punta del lazo. (21) Finalmente, luego de ponerle el broche correspondiente, ya tienes un lazo de Sailor Senshi.

< Para el lazo posterior se sigue el mismo procedimiento sólo que las tiras son más largas. >


Por último, recomiendo que cuando vayamos a coserlo al body, le demos también unas puntaditas en las esquinas para unirlas con el body o con la falda para el de atrás, porque algo como un lazo caído puede dañar un cosplay de Sailor. n_n 
Espero que lo hayan disfrutado y que les sirva de algo, si tienen alguna pregunta, duda, sugerencia o crítica los invito a que comenten ésta entrada. Y si les ha gustado pueden comentar o compartir este tutorial. 


Así se vio mi lazo en el cosplay


lunes, 23 de diciembre de 2013

Tutorial: How to keep the hairstyle on a Sailor Moon Wig - Cómo mantener el peinado en una peluca de Sailor Moon

Todo aquel que haya comprado una peluca de Sailor Moon, de las que ya vienen con el peinado hecho, y tenga un buen tiempo con ella, sabe lo problemático que se torna peinarla y mantenerla, comúnmente las coletas se bajan y las extensiones se enredan, los ganchitos que traen no son muy resistentes y pierden el agarre, era un problema que me tenía bastante preocupada porque no tengo posibilidad de comprar una peluca nueva, así que le pedí ayuda a mis amigos. Mi compañero cosplayer, Jhon, me dio una magnifica idea que me ha funcionado de maravilla, por lo que decidí compartirlo con uds.

Anyone who has ever purchased a Sailor Moon wig that comes with the hairstyle done, and has a considerable amount of time with it, knows how problematic it turns out to comb and maintain it, commonly the pígtails drop down and the hair extensions get tangled, the clips aren't very resistant and they lose their grip; it was a problem that kept me very worried because i don't have the possibility to buy a new wig, so i asked my friends for help. My dearest friend, Jhon, who also cosplays Tuxedo Mask with me. gave me a magnificient idea which has worked wonderfully, this is why i chose to share it with you all.

La mayoría de las pelucas de Sailor Moon vienen en tres partes, la peluca base, dos moños y dos extensiones largas. Primero que nada tendrán que quitarle los moños y las extensiones de la peluca base, esto será traumático si es su primera vez, ¡jaja! No hay vuelta atrás una vez que pasas este punto, pero casi siempre es necesario volver a hacer el peinado por completo. Luego quizás querrán lavar la peluca, con todas las partes por separado. Para esto uso acondicionador de cabello y un poco de suavizante para ropas, dejan la peluca remojando por más o menos una hora, luego remueven con cuidado el acondicionador y suavizante con agua fresca y la ponen a secar, lejos del sol en un lugar fresco. Luego tendrán que peinar las extensiones por separado, cada vez que uso mi peluca se enredan muchísimo, para esto yo normalmente las cuelgo y uso un cepillo especial para pelucas con cerdas separadas, también las plancho y finalmente aplico un poco de cera para cabello. Para estos primeros pasos no tengo fotos, me tendrán que disculpar por mi error :(

Most Sailor Moon wigs come in three parts: the base wig, two buns and two long hair extensions. First and foremost: you have to take out both the pigtails and the buns from the base wig, this might be a shock if it's your first time (don't worry). There's no step back once you get to this point, but it's neccesary to completely remake the hairstyle.
Now you might want to wash the wig, with all parts separated. I use hair conditioner and a little bit of fabric softener, you'll have to leave the wig soaking for an hour or so, then carefully remove the conditioner and softener with fresh water and leave it to dry, away from the sun in a fresh space.

Then we'll comb the extensions separately, everytime i wear my wig these get really tangled! My personal technique for this is: hang them up in a higher place and use a special wig hairbrush, i also iron them and finally apply a little bit of hair wax.


Cepillo para pelucas - Wig Hairbrush
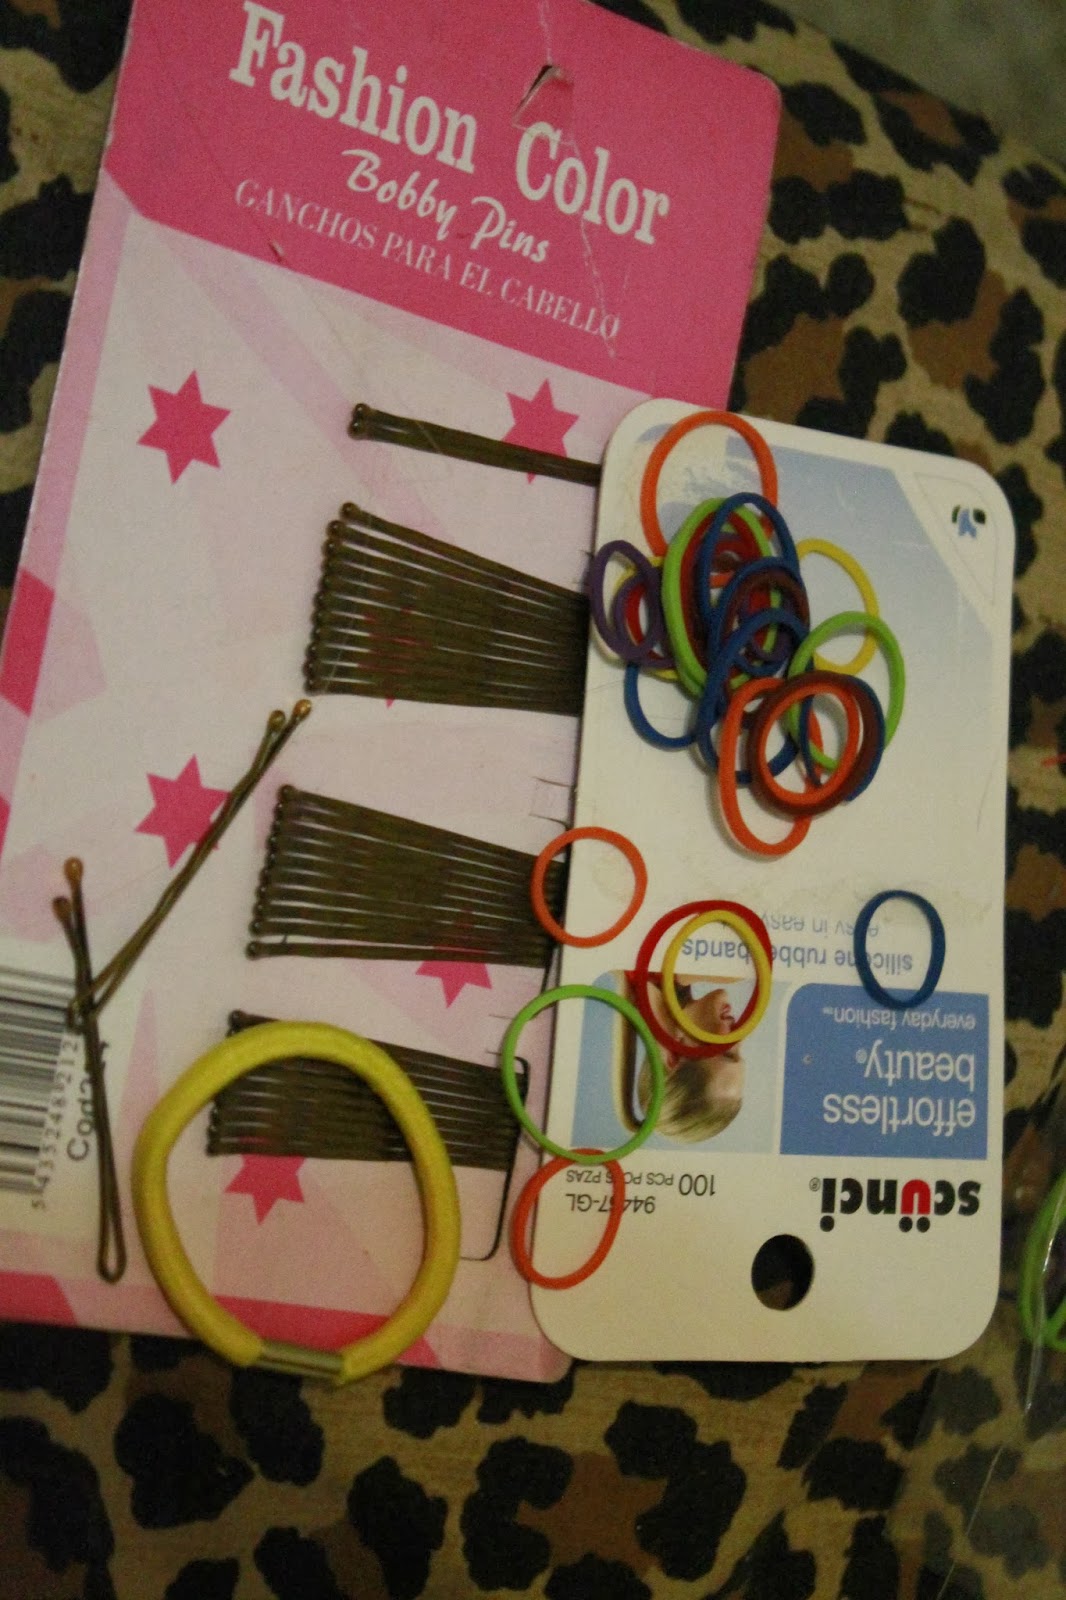
Ahora bien, una vez que tenemos las partes de la peluca listas para hacer el peinado, tenemos que tener los siguientes materiales: ganchitos para el cabello (bobby pins), ligas fuertes (normalmente uso las ligas de papelería que se usan para amarrar papeles o dinero), ligas transparentes, y lo más importante, estos ganchos especiales para hacer moños. Además, es necesario tener una cabeza de anime o una persona voluntaria que use la peluca mientras se peina. Si se usa una cabeza de anime se deben tener alfileres para asegurar la peluca en puntos clave. También necesitaremos laca para el cabello y una pistola de silicón.

Now, once we got the parts of the wig ready to do the hairstyle we must have the following materials: bobby pins, strong hair bands (i use the brown ones that are used to tie down paper or money), transparent hair band, and the most important thing, special bun holders. Also, it's necessary to have a mannequin head or a voluntary person to wear the wig while this gets done. If you use a mannequin head you should use pins to secure the wig on key points. We will also need hairspray and a hot glue gun.


Una vez que tenemos todo preparado, comenzamos por dividir el cabello en la parte superior en inferior. Este tipo de pelucas vienen con la linea del cabello dividida a los dos costados porque es una peluca con dos coletas, lo que vamos a dividir es la parte superior para atarla primero, y luego atar la parte de abajo, esto es para que se sujete mejor la coleta y no se vaya cayendo el cabello por la parte inferior, lo que forma las indeseables "bombas", y además para evitar que las coletas se caigan, esto se debe hacer con mucho cuidado, siguiendo la direccion a la que va el cabello. Además es importante separar la pollina o flequillo del resto del cabello que va a ser atado en la coleta, usando ganchos, para que no se confunda.

Once we have everything ready, we start by dividing the hair in four, the superior and inferior part. These type of wigs come with the hairline divided in both sides because is a double ponytail wig, what we're going to divide is the superior part to tie it first, and then tie the botton part, so we can hold better the tail and the hair won't fall down in the inferior part, We don't want any "bubbles"or loose hairs in our pigtails, and we also want to avoid the ponytails falling down. The tails have to be done very carefully, following the direction and the way of the hair. Is very important to separate the bangs from the rest of the hair that will be tied, using pins.

A la derecha es como queda el peinado y a la izquierda es cómo se ve la peluca suelta. - To the right the final ponytail and to the left is how the wig looks when it's loose. 

Es importante dividir el cabello que no será atado. - It's important to divide the hair that won't be tied. 

Dividiendo partes del cabello. - Dividing parts of the hair.

Primera parte lista. - First part done.


También puedes usar ganchos para asegurar cabellos rebeldes. - You can also use pins to secure rebelious hairs.

Todo listo. - All done.


Esta es la parte más difícil, es posible que te tome varios intentos, es muy molesto y difícil peinar todo en su lugar, si consigues que alguien más te ayude, sería ideal. Luego de peinar las coletas bien apretadas, hay que asegurarse de que estén al mismo nivel y que estén altas, para esto es necesario que te pongas la peluca. Una vez que estés seguro de la posición y la consistencia de las coletas, se debe aplicar laca para mantener todo en su lugar. Ahora, debemos atar el cabello de la coleta en un pequeño moño como el que se ve en una de las imágenes anteriores. Lo siguiente es unir las extensiones de cabello al moño, yo removí los ganchos que traían y cosí las extensiones directamente a un costado de los moños.

This is the most difficult part, it's possible that this might take a few attempts, it's very annoying and it's difficult to comb everything in the right place, if you can get any extra hands on this it would be ideal. After combing the ponytails very tightly, you have to make sure they are on the same level and high up. You may want to put on the wig now! Once you are sure of the position and consistency of the tails, then wer have to apply hairspray to keep everything in place. Now, we must tie down the hair in a little bun like the one you can see in one of the previous photos. Next thing to do is join the hair extensions to the bun, i removed the hooks they had and sewed the extensions directly to one side of the bun.

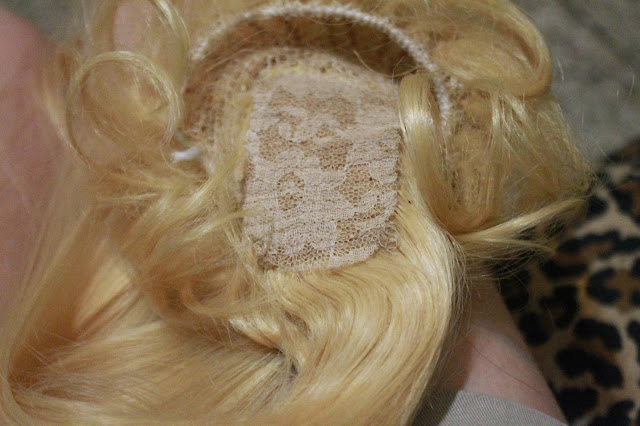

Ahora viene la parte mágica y la solución a todos nuestros problemas. Tendrás que juntar el moño de cabello y el gancho para moños. El gancho tiene que estar totalmente abierto y extendido en toda su capacidad, tendrás que abrir las ligas del moño de cabello para que sea del mismo tamaño del gancho, el cual vas a poner dentro. Para mantenerlos juntos, primero traté de coserlo pero se podría separar, así que decidí pegarlos con silicón. Esto tiene que hacerse con extremo cuidado, podrías dañar los moños o las extensiones si les cae silicón caliente, hay que ser muy sutil con esto y aplicar pequeñas cantidades. Si tienes alguna otra idea, la puedes poner en práctica. Finalmente se ponen los moños en las coletas y se cierran con fuerza. Al final usualmente pongo ligas transparentes encima del moño para lograr la forma circular de estos.

Now comes the magic! .... and basically the solution to all of our problems. You will have to put together the hair bun and the bun holders. The bun holders needs to be extended to full capacity, you will open the ligature of the hair buns to match the size of the holders, which you will put inside the bun.
To hold them together, first i tried sewing it but it might separate so i decided to hot glue it on. This needs to be done with extreme care, you could damage the buns or the extensions if the glue gets to it! You must be very subtle with this and apply little amount of glue.
Finally you put the buns on top of the pigtails and close it strongly. At the end i usually put transparent hair bands to achieve the circular bun shape.


Finalmente listo. Finally Done.
Antes - Before
Después - After


De verdad espero que encuentren útil este tutorial! Hasta la próxima, gracias por leer mi blog. Recuerden seguir https://www.facebook.com/SailorMappy

I really hope you find this tutorial useful! Until next time, thanks for reading my blog. Remember to follow https://www.facebook.com/SailorMappy 


sábado, 23 de noviembre de 2013

How to make your own Spiral Heart Moon Rod for your Sailor Moon Cosplay (Tutorial)

Hello, everyone!
I decided to do this tutorial in english because some people wanted me to make more tutorials in this language, and i believe almost everyone understands it. Also, this is a very simple tutorial, you can understand it basically from just looking at the pictures i took.

My idea for making this sailor moon sceptre started when a dear friend of mine gifted me a magical girl toy she found on some random store, the toy resembled sailor moon style and it immediatly reminded me of the Spiral Heart Moon Rod she used in Sailor Moon S so i had the idea to make it from this "base", plus, it has light and sound when you move it! It's so cute!
I tought: "i can finally have a sailor moon toy!" because i never had the chance to have one when i was a kid. I was excited though it took me almost a year to actually do it because i kept procrastinating.


I couldn't find an original photo of the toy, i took it but it got lost along with my old phone, so you won't have the first part of the tutorial, sadly.


When i started working on it it looked like this

TutorialHeart1

It originally had two white wings at both sides, which i cutted with a really hot knife, but first i took out the screws it had and disarmed the toy because i didn't wanted to cut any wires or any important thing that interfered with the lights or sound of it, so i cutted it separately and then i got the parts together again.
I used the wings for another Sailor Moon wand, the kaleidoscope! (which i made last minute before the con with help from my friends, i need to re-do it URGENTLY!! )


TutorialHeart2

When i had it ready the first thing to do was cover up the heart but leaving the part that had lights. I used "cold porcelain" (masa flexible) to mold it, it is really cheap and easy to work with, i do most of my accesories out of it, with this material you just mold it like you would if you were making something out of clay, and then leave it to dry in some place fresh (but not at direct sun exposure) and it will become hard in a day or so. I added some little red stones i already had, i do this so it will have the shape of the stone but then i take them off when it's time to actually paint the piece, then i glue them together with simple white glue.

TutorialHeart3

TutorialHeart4

I really wanted to give it a "real life" look rather than just a toy, so i decided i will make it with real ribbon and not make it with cold porcelain, i made the bow and then glued it with hot silicone, then i molded the crescent moon part on top of it.

TutorialHeart5

It was rather easy up until now, i had to make it longer and also give it another shape, because as you can see this Heart Moon Rod is wider at the bottom part and when she holds it you can see is much bigger than the toy i had. I didn't really knew what to do... so i figured out this:

spiral_heart_moon_rod_by_sayurixsama-d506px0.png

tumblr_lsczx4bR8s1qm31fpo1_500.png

I added pvc tube at the bottom part, i cutted it and then i glued it with silicone and then secured it with tape.

Tutorial5.jpg

As you can see the shape isn't exactly even, or smooth, so i had to create the whole shape of the bottom part. I did this with paper mache (newspaper and a mixture of white glue and water), i did like 6 layers of this, everytime i did a new layer i had to sand it.

tutoheart6

It didn't look quite as i thought it will be, so i added a cold porcelain layer this time and molded it as much as i could, then i did another 2 or 3 layers with paper mache and finally i did the final layer with cold porcelain (didn't took picture this time, sorry!) at the end it looked quite even and flat.

Tutorial7.jpg
Tutorial8.jpg
500.jpg
And finally it was time to paint it!!
Tutorial10.jpg


Like i mentioned before i wanted it to look like it was the real thing, so i used gold colors and the pink and red were glased satiny style paint which shines but not in a tacky way, i really put a lot of love into this part! it's my favorite thing to do

It turned out like this

Tutorial9.jpg

And it also looks really nice when the heart part is on! It's really cute.

923091_10201075095430215_1572441746_n (1)

I was pleased with the results, this shows you can do anything with cheap chinese imitation toys haha! They are great bases for magical girl props, you just have to think out ot the box and have imagination. All materials used in the making of this sceptre were really cheap and accesible for everyone, it just requires love and dedication to make nice stuff :3 i hope this inspires you to create a lot of beautiful cosplay props.
 
Blog Logo By sayurixsama